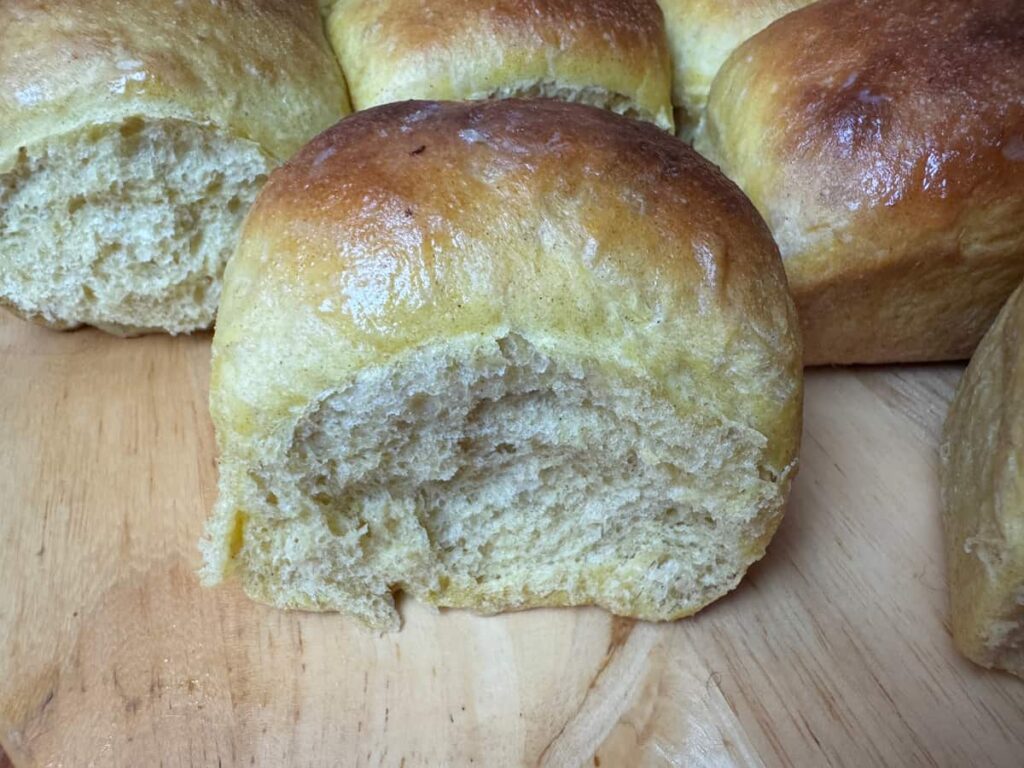
The Best Soft Butternut Squash Dinner Rolls Recipe
Nothing says fall and winter like winter squash recipes. These soft butternut squash dinner rolls are perfect for any meal. They can accompany a weekend roast to a big Thanksgiving or Christmas feast. They’re soft, chewy, and so easy to make. The butternut squash gives them an earthiness that’s perfect for the Autumn season. Bring these butternut squash dinner rolls for your next family meal and everyone will be reaching for seconds!
*As an Amazon Associate I may earn from qualifying purchases at no cost to you.
Why You Need This Butternut Squash Dinner Rolls Recipe
Everyone’s likely had dinner rolls at one point in their lives. The addition of the butternut squash, though, takes them to a whole new level. The squash adds moisture to the rolls, making them so tender and a delight to eat.
Butternut squash also adds a hint of sweetness, earthiness, and nuttiness to the rolls. It takes plain old dinner rolls and makes them fancy. They have a depth of flavor you can’t get from a regular dinner roll. This flavor is what will have you and your family reaching for more.
These are perfect by themselves with a meal. They can be dipped in soups for a little fun twist. Enjoy a little sweeter version of them with some honey, maple syrup, or honey butter. Or have them as a savory side with some herb butter or a bit of gravy. Take leftovers and make delicious turkey and cheese or ham and cheese sliders after your Thanksgiving and Christmas meals. These rolls are so versatile, they never become boring!
How to Make Butternut Squash Dinner Rolls
Ingredients
- 540 g flour (roughly 4 1/5 cups)
- 9 g active dry yeast (2 1/2) tsp
- 12 g honey (1 tsp)
- 1 egg
- 50 g butter + 1 Tbsp to brush the tops
- 200 g butternut squash (1 c)
- 300 mL warm water (1 1/4 c)
- 8 g salt (about 1 1/3 tsp)
Making the Puree
The butternut squash puree is what make these dinner rolls so perfect. For best flavor, make your own puree. It’s so easy to do, but does add an extra step and some additional time.
Check out my post on How to Make Butternut Squash Puree to learn how to make it yourself. One typical sized butternut will make about 3 cups of puree. Freeze the remainder so you have it to make rolls another time. Or use it for a different recipe like my Butternut Squash Bread with Sourdough Discard!
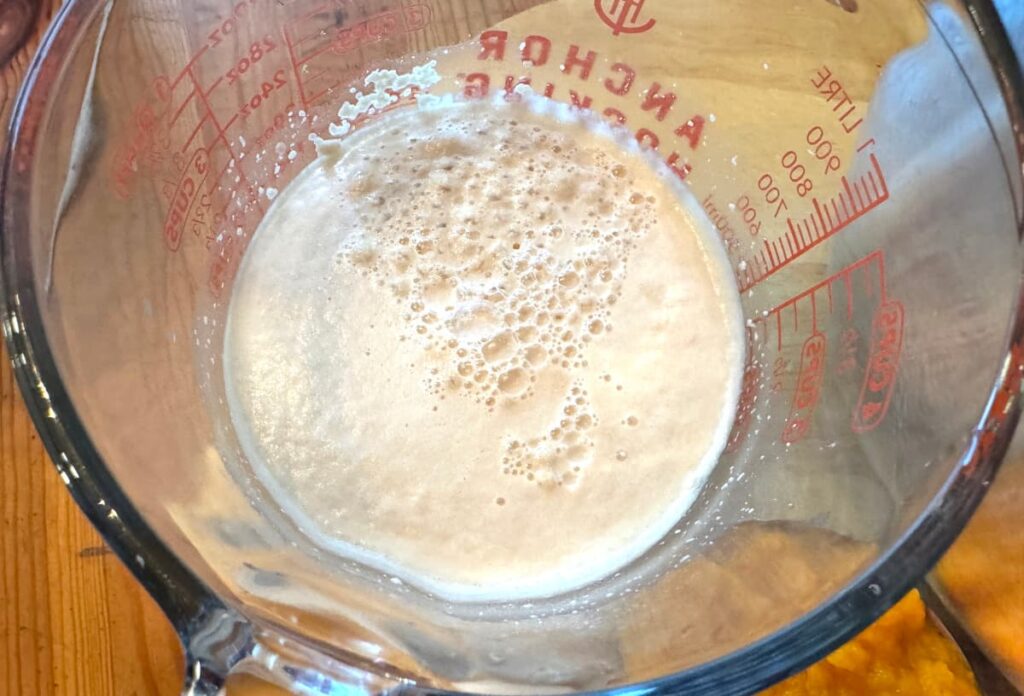
Proof the Yeast if Using Active Dry Yeast
I always use active dry yeast when I bake bread. If you use instant yeast (1 pkt) you can add it straight into the bowl with the flour. If using active dry yeast you need to proof it first. Measure out the water (it must be warm, about 110ºF, 43ºC.
Add the honey to the water then add the yeast. Stir to mix in the honey and fully hydrate the yeast. Let it sit for 5-10 minutes, or until the yeast starts bubbling up. Once the yeast starts bubbling, you know the yeast is active and ready to add to the flour.
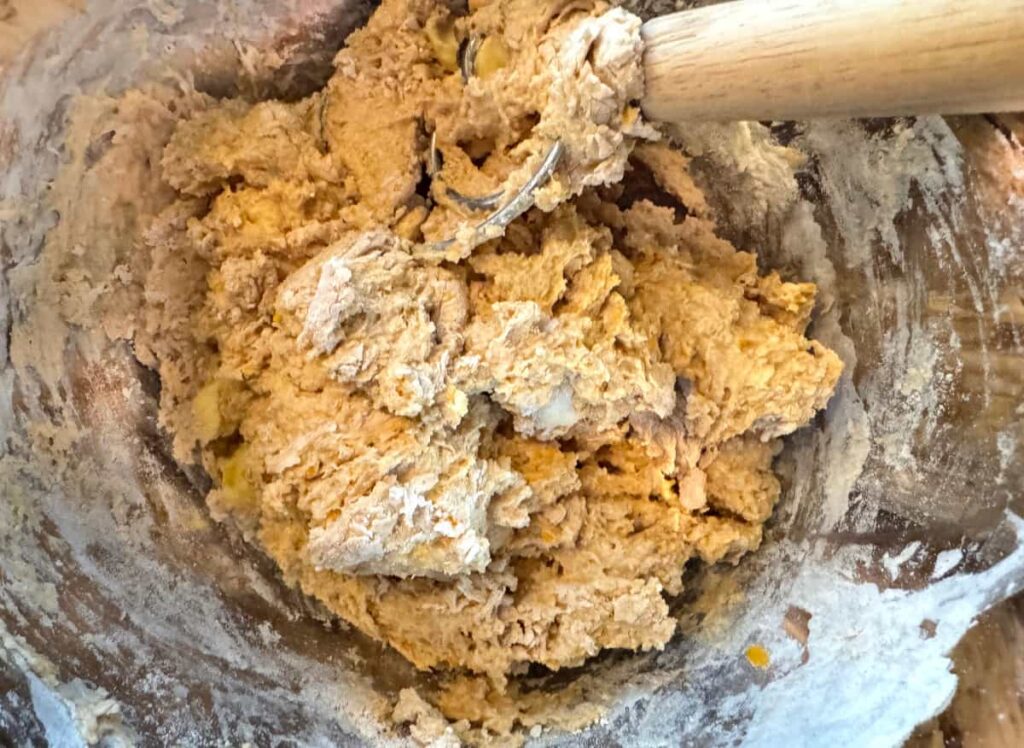
Mix all the Ingredients
Measure all the ingredients and add them to a mixing bowl. I like to use a dough whisk when I mix any bread. They are easy to get through the thicker mix than spoons, in my opinion. You could also use a stand mixer with a dough hook if you choose to.

Mix until all the ingredients are incorporated. Turn the dough onto a floured surface for kneading.
The dough will be a little on the sticky side, that’s okay. Coat your hands with a bit of oil and it’ll help you with the next step of needing.
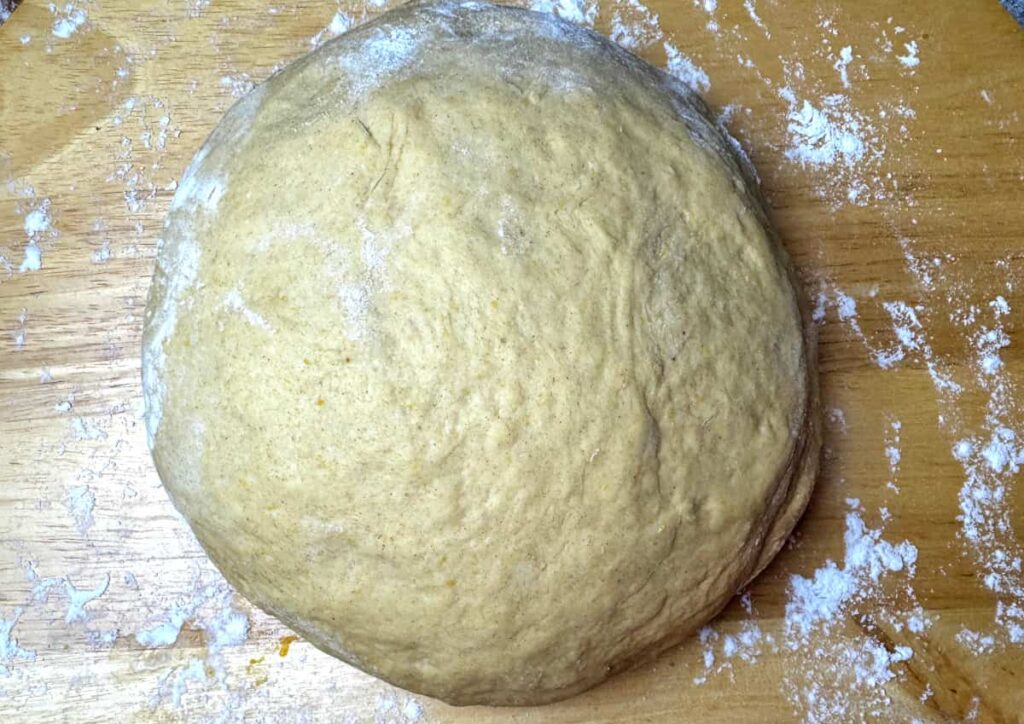
Knead the Dough
Kneading the dough is extremely important. The act of kneading is what makes the gluten in the flour form and gives the bread it’s structure.
Knead the dough until it gets to the window pane stage. This is when you take a small ball of the dough and slowly stretch it. If you can stretch it thin enough to see light through it without the dough tearing, you’ve reached window pane and your dough is ready. Learning this step was a huge game changer in bread making for me.
Here’s a YouTube short showing window pane so you know what to look for:
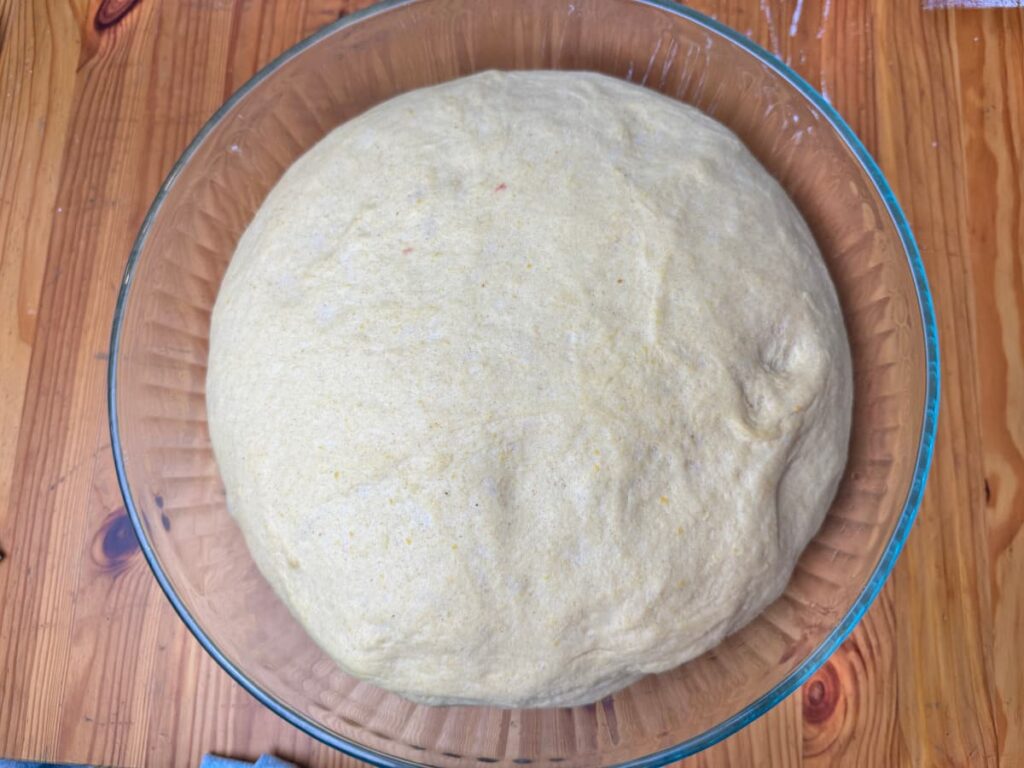
Proof the Bread – 1st Proof
When you’ve reached window pane, the bread is ready to proof. Grease a bowl that’s at least twice the size of the dough. I like to use olive oil to grease the bowl, but butter or cooking spray work as well. This is just so you can get the bread out of the bowl once it’s proofed.
Place the dough into the bowl, then flip it over. The point of this is so all sides of the dough have some of the oil on it so it doesn’t stick to the bowl or the towel over the top of it.
Lay a towel over the bowl so the dough doesn’t dry out and form a skin on it. Place it in a warm place to proof until double in size. That usually takes about an hour in my kitchen, but could take less or more time in yours. The temperature of your kitchen will affect the proofing time, as will the yeast you use. If the yeast is not very active it will also take longer. Keep an eye on it, and it seems about doubled it’s done.
The first proof is forming the structure of the dough.
Proof the Bread Again – 2nd Proof
Butter (or oil/spray) a 9×13 pan.
Take the dough out of the bowl and place it on a table or counter surface. You shouldn’t need to flour the surface, the bread should be smooth now and won’t be sticky.
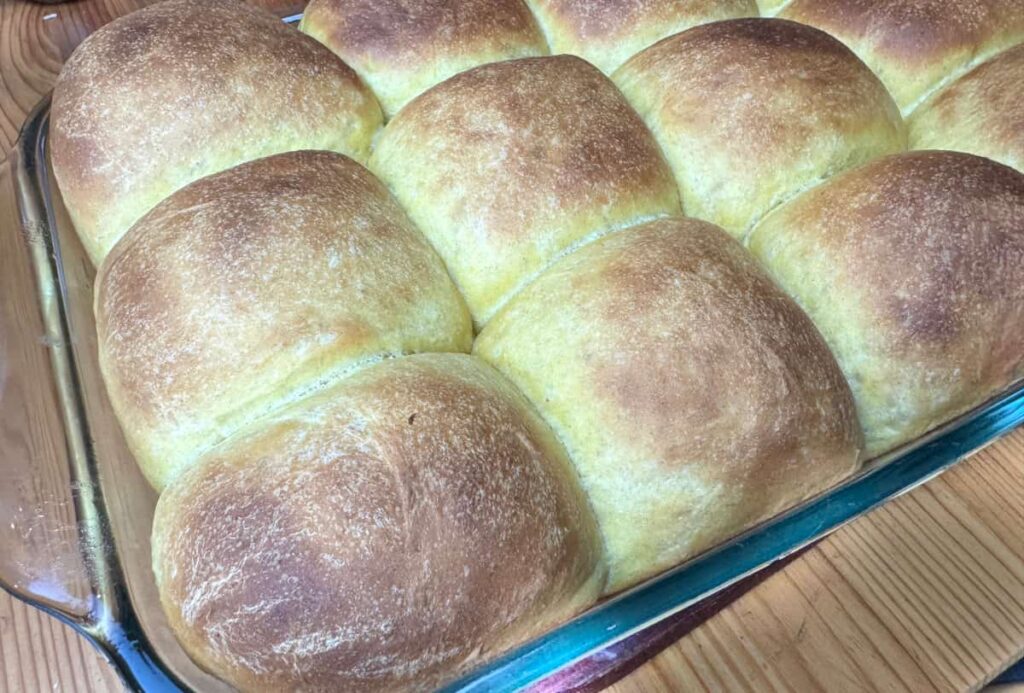
Cut the dough evenly into 12 pieces. Shape each piece into a ball, tucking the dough in and placing the tucked side on the bottom. Place in the 9×13 pan.
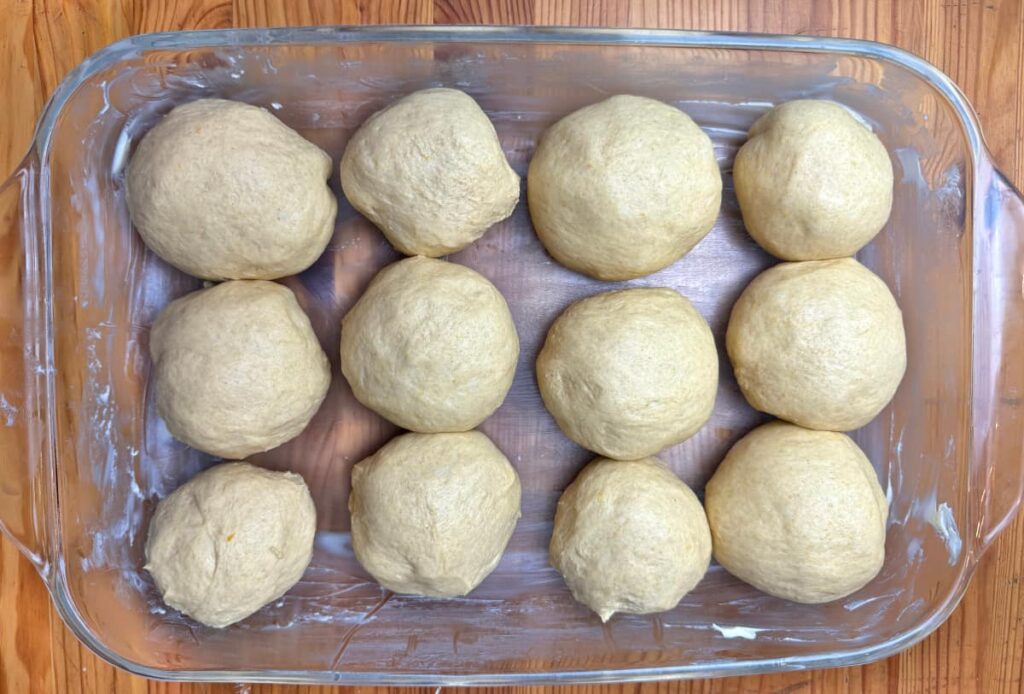
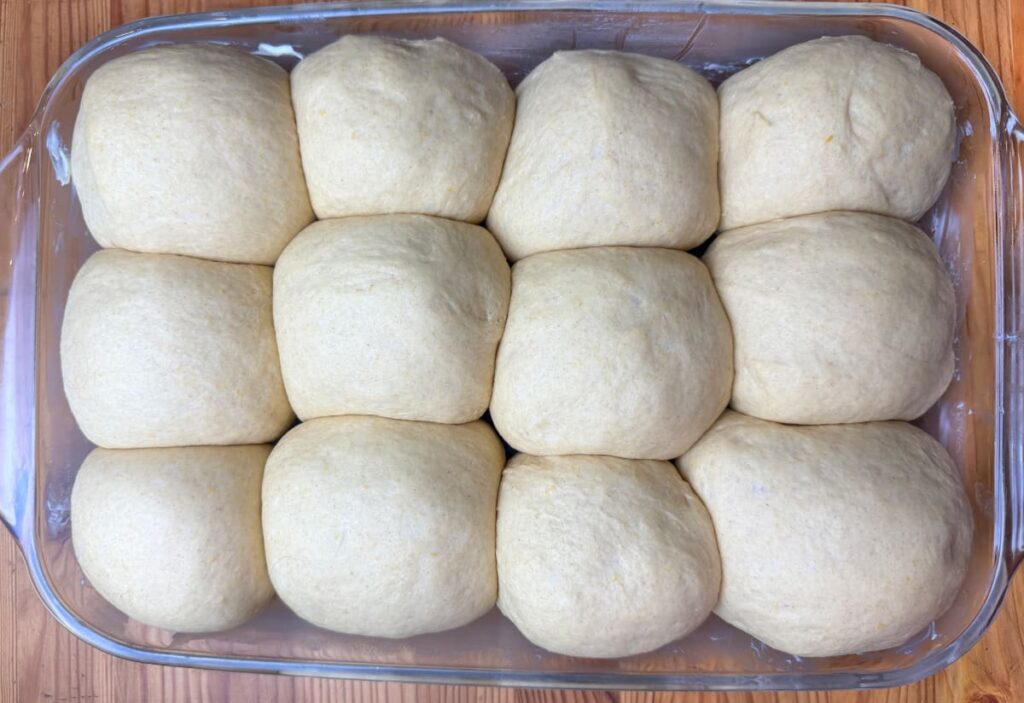
Cover the pan with the same towel used for the first proof. Set back in the warm place for a second proof. This proof should be shorter, only 30 minutes or when they look like they’ve puffed up nicely. They won’t quite double again, but should be about 1.5 times their original size.
This second proof is all about developing flavor, so don’t skip it!
Bake the Butternut Squash Dinner Rolls
Preheat the oven to 425ºF, 218ºC.
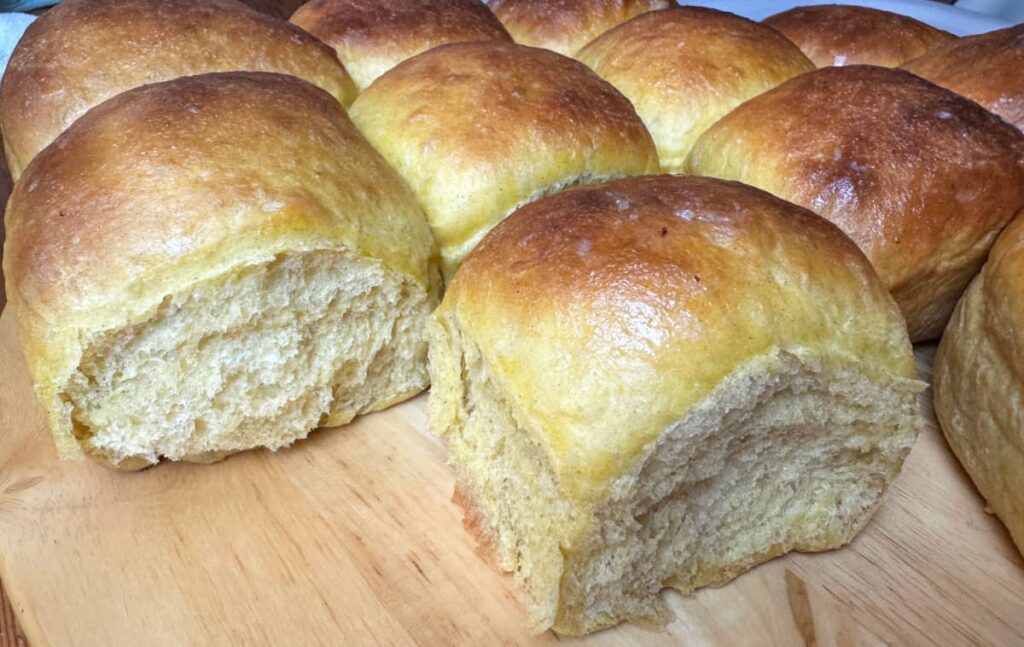
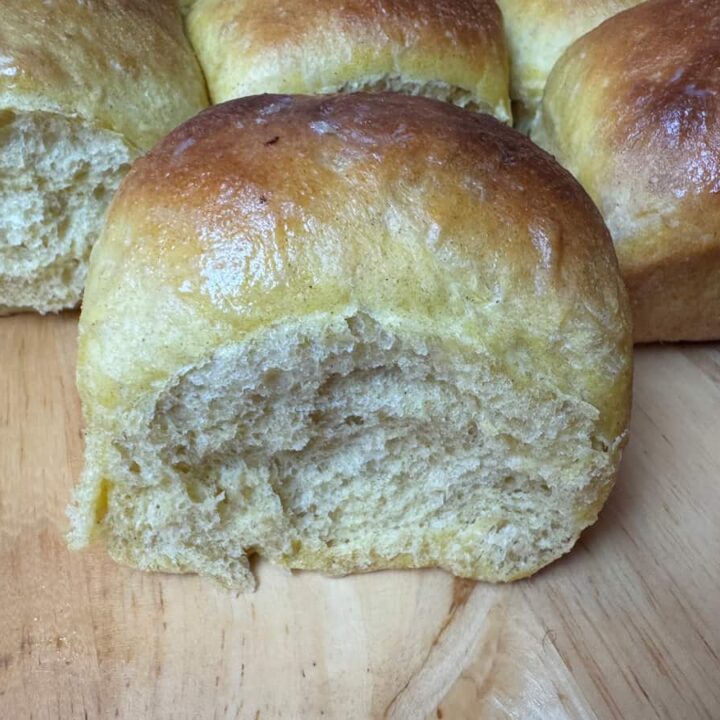
While the oven is preheating, brush the tops of the rolls with melted butter. Place the rolls in the oven once preheated. Bake 18-20 minutes. The tops should be golden brown and the roll should bounce back if you push on it.
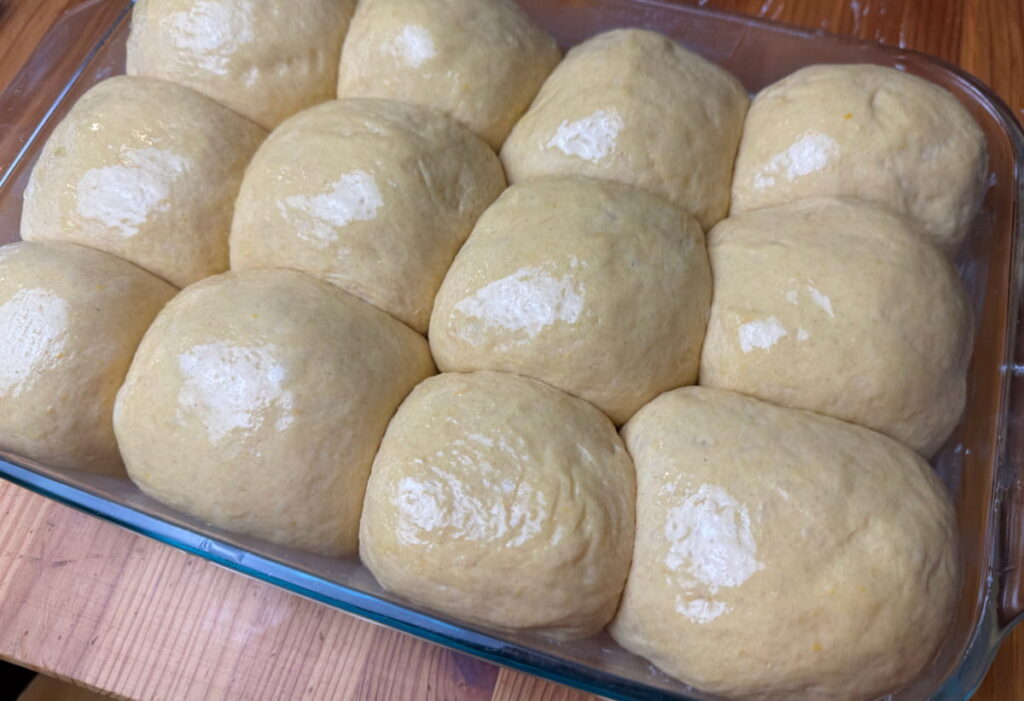
Brush again with butter when the rolls come out of the offen. Let the rolls cool slightly before enjoying.

Enjoy Your Butternut Squash Rolls!
These rolls are delicious with just butter, but you can add more flavor with garlic butter or an herb butter. You can also drizzle honey on them or fill them with jam for a sweet treat.
These rolls are perfect as a side dish for your favorite dinner. They pair well with a roast, baked chicken, or anything with gravy. They would also make the best sliders. Use your imagination and share in the comments how you choose to eat them.

Butternut Squash Dinner Rolls
Soft, fluffy, and lightly sweet, these butternut squash dinner rolls get their tender texture and warm golden color from roasted squash. Perfect for fall meals, holiday tables, or cozy weeknight dinners, they’re delicious served warm with butter or honey.
Ingredients
- 540 g flour (roughly 4 1/5 cups)
- 9 g active dry yeast (2 1/2) tsp
- 12 g honey (1 tsp)
- 1 egg
- 50 g butter + 1 Tbsp to brush the tops
- 200 g butternut squash (1 c)
- 300 mL warm water (1 1/4 c)
- 8 g salt (about 1 1/3 tsp)
Instructions
- Add honey to the warm water then sprinkle the yeast over the top.
- Mix well until the honey is dissolved and the yeast is fully hydrated.
- Add all the ingredients to a bowl and mix until combined. The butter will still be in chunks, that's okay. It'll get mixed in properly during the kneading process.
- Turn the dough out onto a floured surface and knead until window pane is achieved, about 8-10 min. You can also use the dough hook of a stand mixer.
- Place in a greased bowl and place in a warm spot to proof.
- Proof until doubled in size, about an hour.
- In the meantime, butter a 9x13 pan.
- Once doubled in size, turn the dough out of the bowl and separate into 12 equal pieces.
- Form each piece into a ball.
- Place the balls into a 9x13 pan.
- Set in a warm spot to proof again for 30 min.
- Preheat oven to 450ºF, 218ºC.
- Once proofed, bake for 18-20 minutes, until golden brown and the rolls spring back when you push on them.
- Cool slightly and enjoy!
Frequently Asked Questions
Q: Can I use canned butternut squash instead of fresh?
A: Yes. You can use canned butternut squash purée—just make sure it’s 100% squash with no added sugar or spices. The texture should be thick, similar to pumpkin purée.
Q: Can I use a different type of squash?
A: Yes. Other winter squashes like kabocha, honeynut, or buttercup work well. Pumpkin or sweet potato purée can also be substituted. Just be sure the purée is smooth and not watery, as extra moisture can affect the dough.
Q: Can I make these rolls ahead of time?
A: Absolutely. You can prepare the dough and let it rise in the refrigerator overnight. Bring it to room temperature, shape, and bake the next day.
Q: Can I freeze butternut squash dinner rolls?
A: Yes. Baked rolls freeze well for up to 2–3 months. Let them cool completely, then store in an airtight freezer bag. Thaw and warm before serving.
Q: Why are my rolls dense instead of fluffy?
A: Dense rolls are often caused by too much flour, inactive yeast, or under-proofing. Be sure to measure flour correctly and allow the dough to rise until doubled.
Q: Can I make these rolls dairy-free?
A: Yes. Swap the butter for a dairy-free alternative and use plant-based milk. The squash helps keep the rolls soft even without dairy.
Q: What’s the best way to reheat dinner rolls?
A: Warm them in a 300°F oven for 8–10 minutes or microwave briefly with a damp paper towel to restore softness.


Cannot wait to try this – such a fabulous idea so thank you!!!! I would have never thought of adding butternut squash to a roll recipe and we always have so much squash 🙂
I hope you love it!