How To Soil Block For Seed Starting: A Step-By-Step Guide
Soil blocking isn’t what most people first think of when starting seeds. Seed trays are still the norm for most. But once you understand how to soil block, it becomes one of those gardening skills that changes your seed starting game for the better. This guide will walk you through exactly how to use a soil blocker, step by step, in a way that’s practical, beginner-friendly, and built from my own experience from using them for several years now.
*As an Amazon Associate I may earn from qualifying purchases at no cost to you.
What is a Soil Blocker?
A soil blocker is a tool that makes perfectly square blocks of soil with an indent in the middle to plant seeds in. You pack soil into the squares of the soil blocker, then push down on the handle to make perfect blocks of soil to plant your seed in. No containers needed.
Most soil blockers come in a ¾ inch size, a 2 inch size, and a 4 inch size. One of the things I love about these is that each size up is built with a hole that you can fit the smaller size into. The 2 inch soil blocker has a ¾ inch hole that you can fit the smallest blocks in. The 4 inch soil blocker has a 2 inch square in the middle that you can slip the 2 inch size blocks straight into. This makes “potting up” super easy.
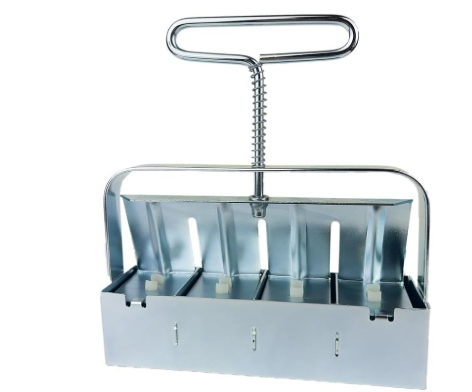
I have a Ladbrooke 2 inch soil blocker that is, by far, my favorite. I don’t use the ¾ inch and I haven’t used the 4 inch soil blocker yet just due to the cost of them. But I do plan on investing in one eventually and will update this post once I do.
Why You Want To Use Soil Blocks to Start Seeds?
I’ve been starting my own seeds for many years now. During that time I’ve experimented with different ways of starting seeds. A couple of years ago I decided to try a soil blocker and it was a game changer for me!
Using pots to start seeds has been the standard for as long as I can remember. We didn’t start our own seeds inside when I was little, but when I grew up and had my first real garden I wanted to give it a try. I didn’t know it then, but that was the start of my passion for seed starting.
Buying starts is expensive, and it seems the price of them go up every year. I understand that not everyone has space or the means to start their own seeds. But if you are able to and have never given a soil blocker a try, maybe you will after reading this post.
I switched to a soil blocker about 4 years ago now and I can’t imagine ever going back to pots. For transparency, I do up-pot my tomato and pepper starts to pots because I have to start them quite early. They outgrow my 2” soil blocks before my weather is warm enough to transplant them outside. But these are the only plants I use pots for, and I do not start my seeds in them.
Check out my post on the Benefits of Soil Blocking for more detailed information on how soil blocks can help you grow strong, healthy seedlings.
What You’ll Need to Get Started
Before you begin, gather all your supplies to make everything easy.
You’ll need:
- A soil blocker – My go-to is the Ladbrooke 2 inch soil blocker that I’ve been using for several years now
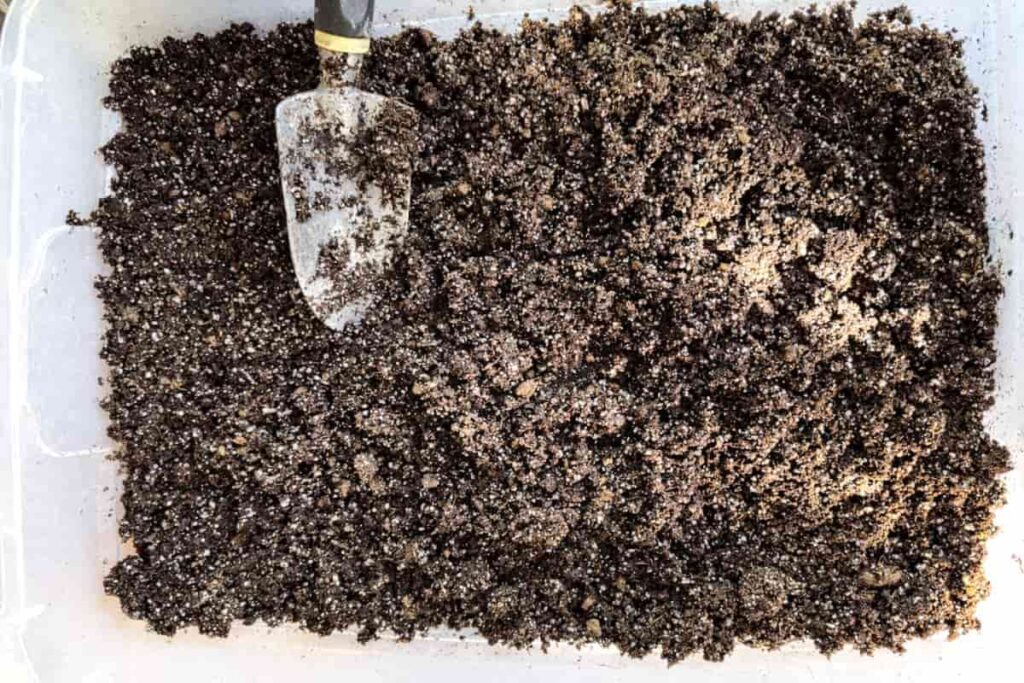
- A seed starting mix, or soil that’s been sifted through a 1/4 inch screen
- Tub with no holes and a fairly flat bottom to put your soil in
- A tray with no drainage holes and a mostly flat bottom – I use a standard 10×20 inch seed starting tray. My favorites are these sturdy seed starting trays from Bootstrap Farmer.
- Trowel – I have a Fiskar’s trowel like this one that I’ve been using for at least 10 years.
- Water
- Seeds
- Labels – I usually just use painter’s tape on the side of the tray.
- Spray bottle with water
The most important piece here is the soil mix. Just like all seed starting methods, soil blocks are only as good as the soil you put into them. Don’t use soil that has large chunks of wood or your blocks will not stay together very well. I use Black Gold seed starting mix mostly because that’s what my nearest store carries. Any seed starting mix, even one you make yourself, should work well as long as there aren’t any large chunks of wood or other debris in it.
How to Soil Block: Step-By-Step
1. Moisten the Soil Thoroughly
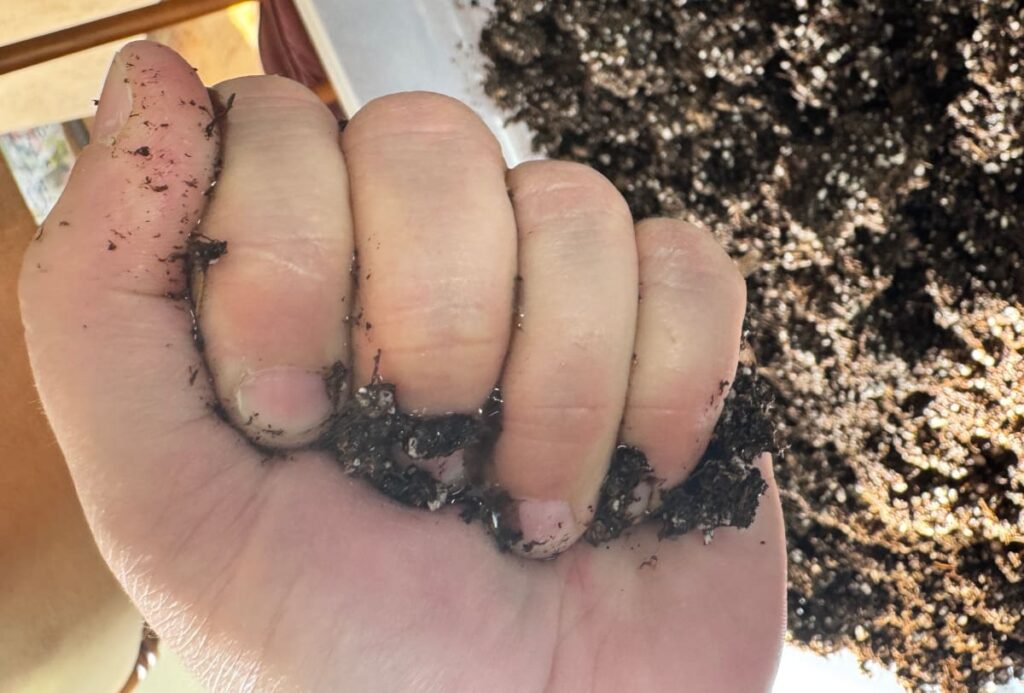
Add water to your soil mix gradually. Mix thoroughly before adding more water, making sure all dry pockets are fully hydrated. The mix should feel damp. When you take a handful of it and squeeze, you should see just a little drip of water run out between your fingers. The soil should compact nicely when you open your hand. If the soil is too dry, or too wet, it won’t stay together to form blocks.
After adding water it’s best to let it sit for 30 minutes to an hour. This allows time for all the water to be absorbed by the soil.
2. Pack the Soil Blocker
Press the soil blocker into the soil firmly. I like to wiggle it a bit while pressing to make sure the soil is fully packed into the soil blocker. You may need to pick it up and press it into the soil multiple times to make sure there’s enough soil in the blocker to form the soil blocks. It’s better to pick up to much soil than not enough.
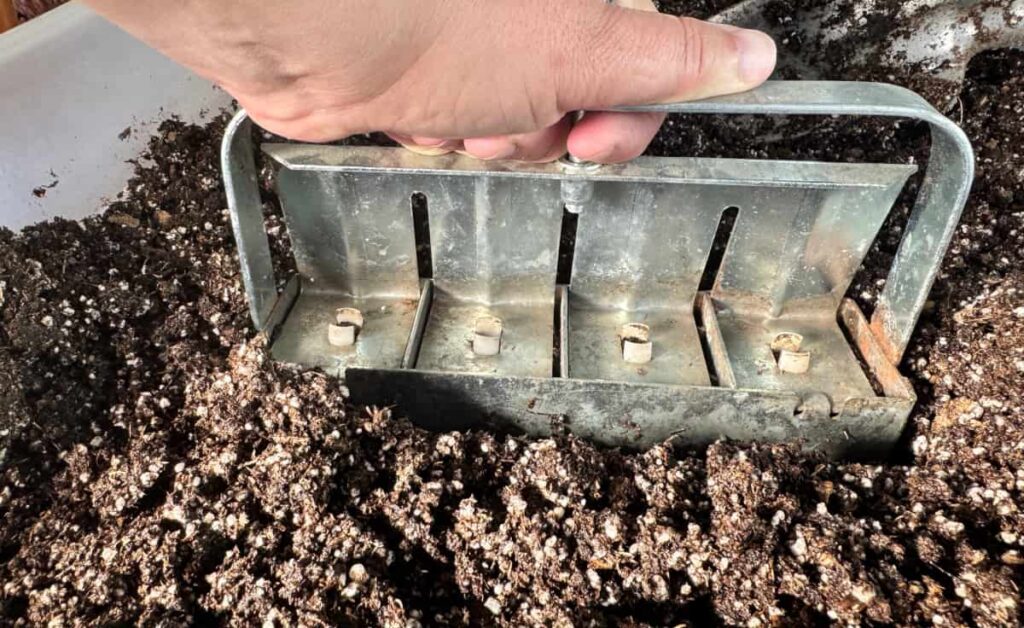
3. Level the Bottom
Scrape the bottom of the blocker against the side of your container to remove excess soil. A flat bottom helps the blocks release cleanly and sit evenly in the tray.
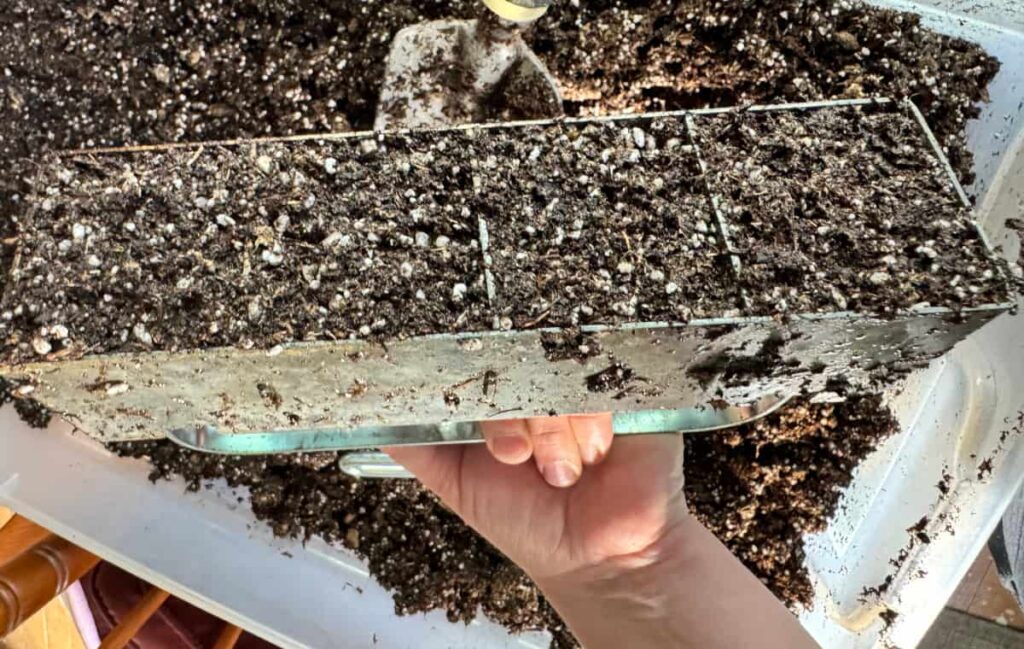
4. Release the Blocks
Set the soil blocker onto your tray where you want the blocks to sit. Squeeze the handle to release the blocks. Lift the blocker straight up after releasing the blocks so you don’t accidentally break any of the blocks.
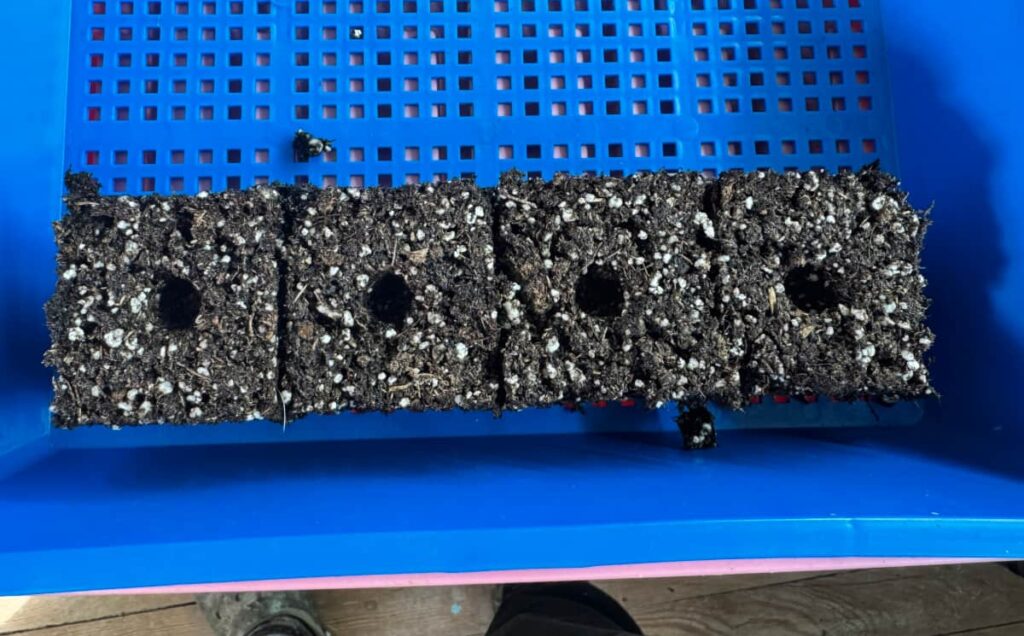
5. Check the Blocks
The blocks should be sturdy and well-defined, with a small indentation in the middle for seeds. If they crumble or crack, adjust the moisture level and try again.
Perfect blocks come with practice. If you accidentally knock off a corner of a block, it won’t affect it’s ability to house your seeds. Don’t stress, even imperfect blocks have grown me lots of beautiful plants.
Planting Seeds in Soil Blocks
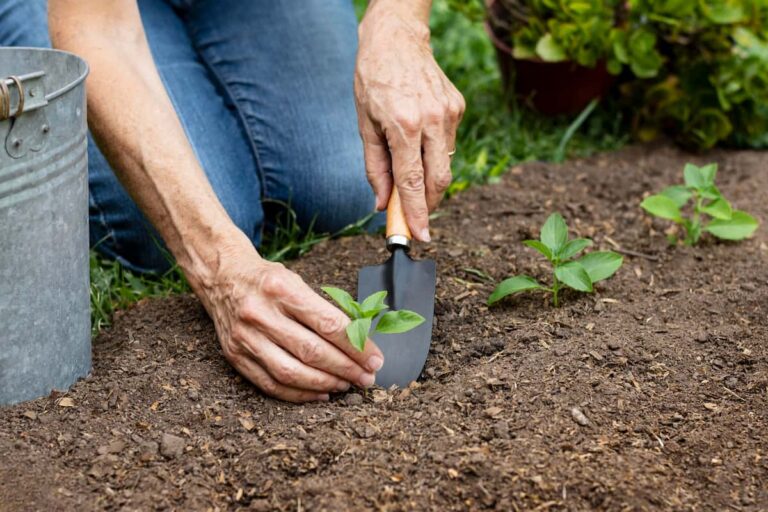
Each soil block includes a small indentation that makes planting easy. Place a seed directly into center of it. It’s best practice to try for only one seed per block. But don’t fret if you drop more than one. You can thin them out once they sprout. Or if it’s something that’s robust, like tomatoes, you can split them later when you up pot them or plant them outside.
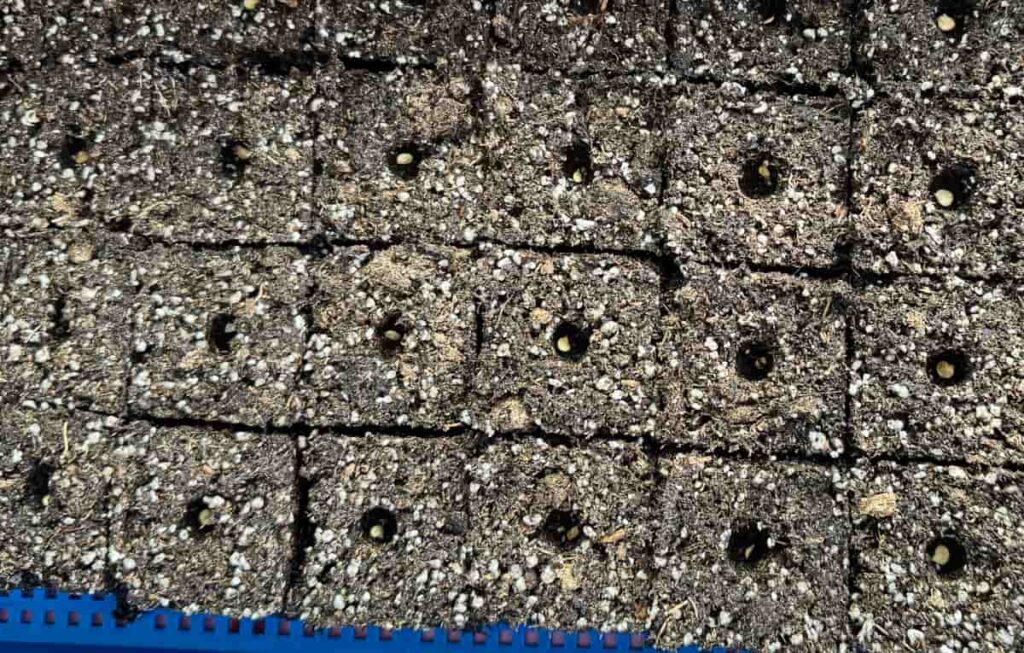
Always follow standard seed depth guidelines as much as possible. Some seeds prefer light and should be left uncovered, while others need a light layer of soil on top. If you’re unsure, check the seed packet for depth instructions. For those that need to be buried, I take a small amount of soil and fill in the indentation with it to cover the seed.
Watering and Caring for Soil Blocks
When the seeds are first planted, I like to water with a spray bottle. It’s a very gentle way to water delicate seeds. You can also bottom water.
It’s best to leave a bit of room between rows if you can to allow for bottom watering. Or you can use a tray with holes and place it inside a tray without holes. Lift the tray of seedlings, fill the other tray with about a quarter inch of water and gently set the top tray back down. The blocks will absorb the water. I bottom water as soon as the seeds start to sprout, or if I see the blocks are starting to dry out at the bottom. If using only one tray, pour water in the gaps between blocks and let them slowly soak it up. This prevents erosion and keeps seedlings stable.
Keep the blocks evenly moist but never soggy. Because they’re exposed to air, they may dry out faster than traditional pots, especially around the edges. Be sure to keep an eye on them and check them every day.
Good airflow is very important. A small fan on low helps prevent dampening off and encourages sturdy stem growth.
When and How to Transplant Soil Blocks
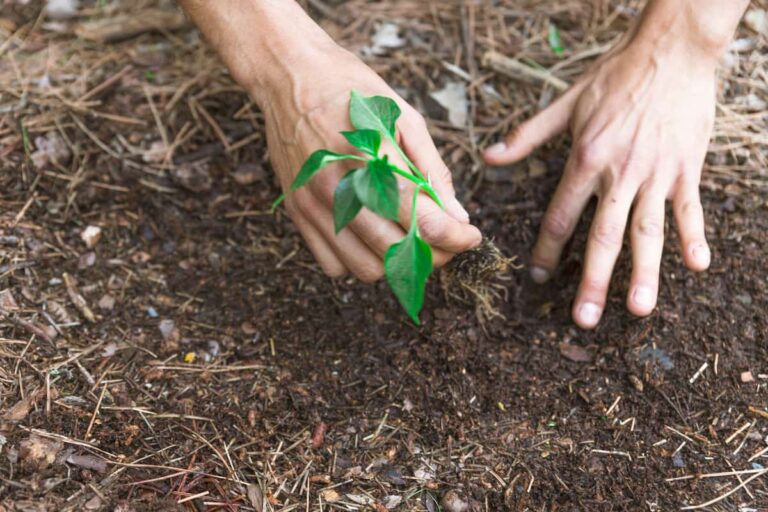
One of the best things about soil blocking is how easy it is to transplant them out to your garden.
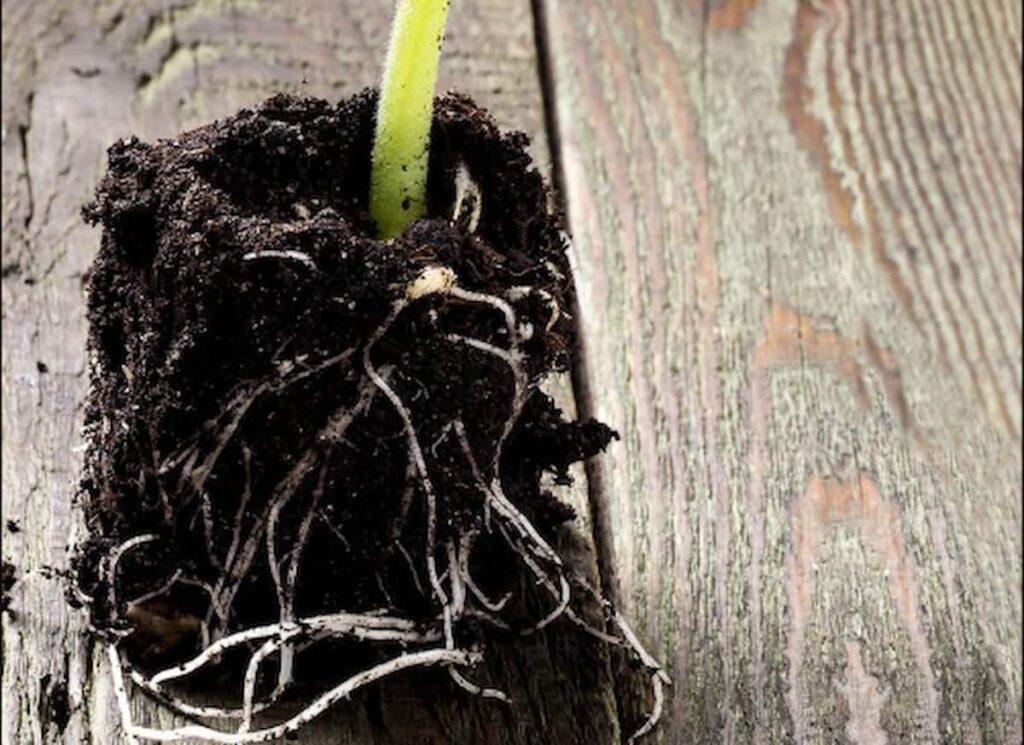
When roots begin to show on the sides of the block and the seedling looks balanced and healthy, it’s ready for the garden or for potting up into a larger block. Make sure the weather outside is appropriate for the plant. Don’t try to plant it outside if the weather is too cold, even if it looks ready to go out.
To transplant, simply lift the block and place it directly into the soil. There’s no need to loosen roots or disturb the plant. The block settles into the soil, and the roots continue growing without interruption.

Common Soil Blocking Problems and How to Fix The
If your soil blocks aren’t working the way you hoped, a small adjustment is usually all you need to get them back on track.
- Blocks falling apart usually mean the mix is too dry – dump the blocks back into your tub, add a bit more water, and try again.
- Mushy or slumping blocks generally have too much water – put the blocks back into your tub. Either add more soil to the tub and mix to soak up some of that water, or let the soil sit and dry a bit. The second option can take time, even a day or two depending on how wet it is.
- Slow growth often points to insufficient light or nutrients – Add grow lights, or lower them so they are a couple inches above the plant. If a lack of nutrients is the problem, add a diluted fertilizer at 1/4 strength and bottom water the blocks with it.
- Mold issues typically improve with better airflow – add a fan to improve the flow of air over your blocks.
Soil blocking has a learning curve, but you don’t have to be perfect right away. Each tray gets easier.
Is Soil Blocking Right for Every Gardener?
Soil blocking works especially well for gardeners who start many seeds, want healthy transplants, or want to reduce their use of plastic. It may feel like you have a learning curve, but the payoff is worth it in stronger plants and easier transplanting. Now that I know how to use soil blocks to start plants, I can’t imagine going back to pots.
Traditional seed trays are still a great option, don’t feel like this is the only way to start seeds. And soil blocking doesn’t have to replace all of your seed starts. It is a great tool especially for plants that you want to start a little early but don’t like their roots disturbed, like cucumbers and squash.
Video Tutorial on How to Use Soil Blocks
For a visual tutorial, check out my YouTube video on how to use a soil blocker.
Frequently Asked Questions About Soil Blocking
Q: Do I need a special soil mix to use a soil blocker?
A: No, but you do want a soil mix that does not have a lot of woody debris and drains well. A good soil blocking mix should be fine-textured, evenly moist, and compressible. When squeezed in your hand, it should form a firm clump, dripping a few drops of water, and not fall apart.
Q: Can beginners use a soil blocker?
A: Absolutely. Soil blockers may look intimidating at first, but they’re very beginner-friendly once you understand the soil moisture and pressure when using the soil blocker. Most early frustrations come from soil that’s too dry or too wet, not from the tool itself. After a tray or two, the process becomes easier.
Q: What seeds work best in soil blocks?
A: Most vegetables, herbs, and flowers grow very well in soil blocks. Crops like tomatoes, peppers, lettuce, brassicas, basil, and zinnias are especially well-suited. Very large seeds can still be started in blocks, but they may need deeper indentations or larger block sizes.
Q: How often should I water soil blocks?
A: Soil blocks should be watered when they begin to lighten in color or feel dry at the surface. Always water from the bottom by adding water to the tray and allowing the blocks to absorb it. Or use a spray bottle if just moistening the top. Because soil blocks are exposed to air, they may need more frequent watering than pots, especially in warm or dry conditions.
Q: Why are my soil blocks falling apart?
A: Blocks usually fall apart because the soil mix is too dry or not packed firmly enough. Add a bit more water to the mix and apply steady, even pressure when filling the blocker. The blocks should feel solid when released.
Q: Can I reuse soil blocks or soil blocking mix?
A: Soil blocks themselves are single-use, but leftover soil mix can be reused if it hasn’t grown seedlings yet.
Q: Do soil blocks need fertilizer?
A: Yes if seedlings will remain in blocks for more than a few weeks. A gentle liquid fertilizer or compost tea can be added once true leaves appear. Start lightly, mix at only about 1/4 strength, and observe plant growth. Too much can burn your delicate seedlings.
Q: Is soil blocking worth the effort and Extra equipment?
A: For many gardeners, including me, the answer is wholeheartedly yes. Soil blocking often produces stronger seedlings with healthier root systems and less transplant shock. While it may take slightly longer than filling seed trays, and require the extra equipment of a soil blocker, many gardeners find the results well worth it.