How to Use Medicinal Herbs: 10 Simple Ways for Better Health
Learning how to use medicinal herbs is a natural way to boost your health and wellbeing. From soothing teas to powerful tinctures, these natural remedies have been used for centuries to support the health of people and animals. Whether you’re a beginner or seasoned herbalist, understanding the many ways to use medicinal herbs can give you the confidence needed to take charge of your health naturally. In this post, we’ll explore 10 different ways to incorporate medicinal herbs into your life.
Culinary Uses: How to Use Medicinal Herbs in Your Kitchen
The kitchen is one of the oldest apothecaries. Long before pills, powders and even tinctures, our ancestors used common kitchen herbs not just for flavor, but for their incredible health benefits. Integrating medicinal herbs into your cooking is a simple and delicious way to support your well-being every day.
Fresh Eating: Salads, Dressings, and Garnish
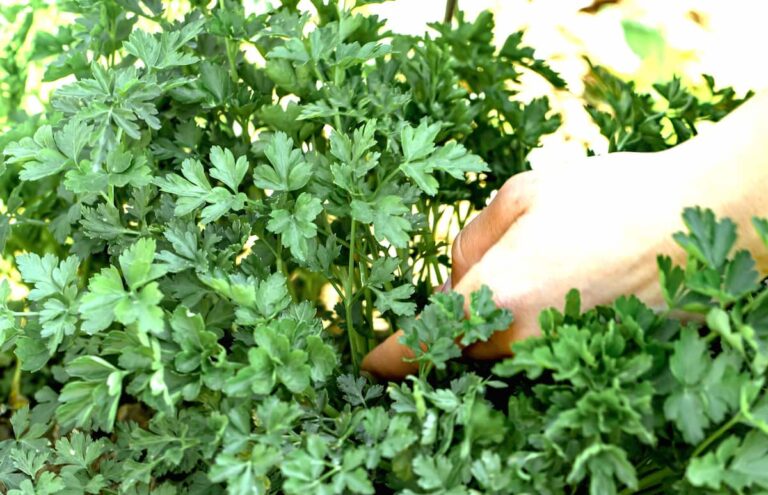
Nothing beats the vibrant flavor and health punch of fresh herbs. In their raw form, many herbs retain more of their medicinal benefits than when they are cooked or dried. Try adding a generous handful of chopped parsley to a salad or topping your soup for dinner. Try adding some spring dandelion leaves or sorrel to your salad as part of the greens. Whisk fresh dill into a creamy yogurt dressing for digestive support and a probiotic boost. Simply garnishing a dish with fresh herbs is an easy way to get a dose of their benefits without much effort.
Cooked: Soups, Stews, and Main Dishes
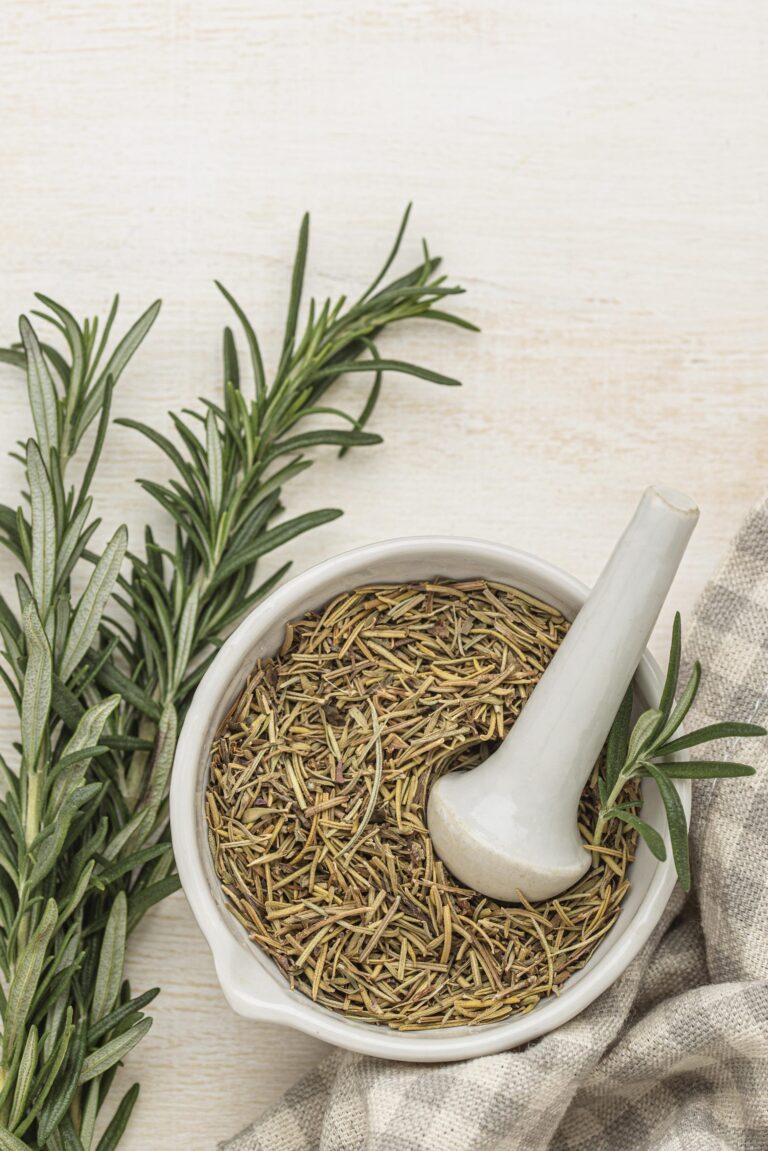
While fresh is great, cooking with herbs can bring out their rich, earthy flavors and make some of their compounds easier for your body to absorb. Herbs with tougher leaves like rosemary and thyme are perfect for long-simmering dishes. A few sprigs of thyme in a chicken soup or rosemary in a pot roast not only adds a beautiful aroma but also provides a powerful antioxidant boost. Don’t be afraid to experiment and add a sprinkle of dried or fresh herbs to any dish you’re making.
Some herbs can also be part of the star of the meal. While stinging nettle is not so pleasant to touch fresh, when cooked the stinging compounds are broken down and it can be eaten as a spinach substitute. Layer it in lasagna or stuff it in your favorite meat with some goat cheese. Delicious!
Flavoring with Herb-Infused Oils and Vinegars
A simple way to integrate herbs is to infuse them into your pantry staples. Making an herb-infused olive oil with basil, oregano, or rosemary is incredibly simple and can be used to add a final flourish to countless dishes. Similarly, an herbal vinegar made with tarragon or chives can elevate a simple salad dressing to a whole new level, all while delivering the subtle medicinal properties of the herbs. It’s a different, tastier, way of taking your daily herbal medicine.

Herbal Teas, Decoctions, and Infusions
The practice of making herbal teas is as old as herbal medicine itself. By using water as a gentle solvent, we can extract an herb’s a variety of compounds—from soothing mucilage to potent volatile oils. While we often use the word ‘tea’ for all of these preparations, there are subtle differences in method that can change the final result. Understanding these techniques helps you get the most out of your herbs.
Teas: The Gentle Approach
Who doesn’t like a good cup of tea? Teas are perfect for delicate herb parts like flowers and leaves, as they extract their volatile oils and gentle compounds. Teas are also great for tougher plant parts that have been roasted, such as roasted dandelion root. Simply pour hot water over your herbs, cover your mug to trap the steam, and let it steep. A cup of chamomile tea, for example, is perfect for a calming evening drink.
How to Make an Herbal Tea
- Bring water to a boil.
- Add the herbs (loose or in a tea ball or tea bags like these) to a cup or teapot. Use about 1 tsp herb per 8 oz of water.
- Pour the hot water over the herbs.
- Cover and let steep for a specific time (usually 10-15 minutes). Covering is important to trap volatile oils in the steam. You can use a small plate to cover your mug, or get a mug that has a lid. Some mugs even come with an infuser.
- Enjoy your tea!

Decoctions: The Simmering Method
When you need to extract the herbal medicine from hard or woody parts of a plant, such as roots, barks, or seeds, a decoction is the way to go. This method involves simmering the herbs in water for a longer period. The heat and time break down the tough plant fibers, allowing you to pull out deep-seated minerals and potent compounds. A classic example is a decoction of ginger root and cinnamon sticks, which creates a warming and powerful remedy for winter colds.
The long, slow simmer helps to break down tough plant material and extract minerals and other compounds that a simple tea wouldn’t. This results in a much more concentrated and potent liquid.
How to Make an Herbal Decoction
- Place the herbs and cold water in a saucepan. Use about 1 oz of herbs per 8 oz of water.
- Bring the mixture to a boil.
- Reduce the heat and let it simmer (usually for 20-40 minutes).
- Strain the liquid.
- Let it cool slightly and enjoy!
Infusions: The Long Game
For certain herbs, like marshmallow root or linden blooms, an infusion is the best way to get all the medicinal benefits. This method uses time and heat to extract medicinal properties. Simply let the herbs soak in water for several hours or overnight. This process is perfect for drawing out soothing, mucilaginous compounds.
How to make an herbal infusion
- Boil water, enough for the size of container you’re using.
- Place herbs in a heat proof container that has a lid. I like to use mason jars. Place 1 oz of herb per quart in the jar/container.
- Pour the boiling water over the herbs, using the 1 oz of herb to 1 quart of water ratio.
- Cover the jar and let it sit on the counter until completely cool.
- Once cool, place in the fridge and enjoy as needed.
- Each infusion will last up to 3 days in the fridge. After 3 days, you’ll want to make a new batch.
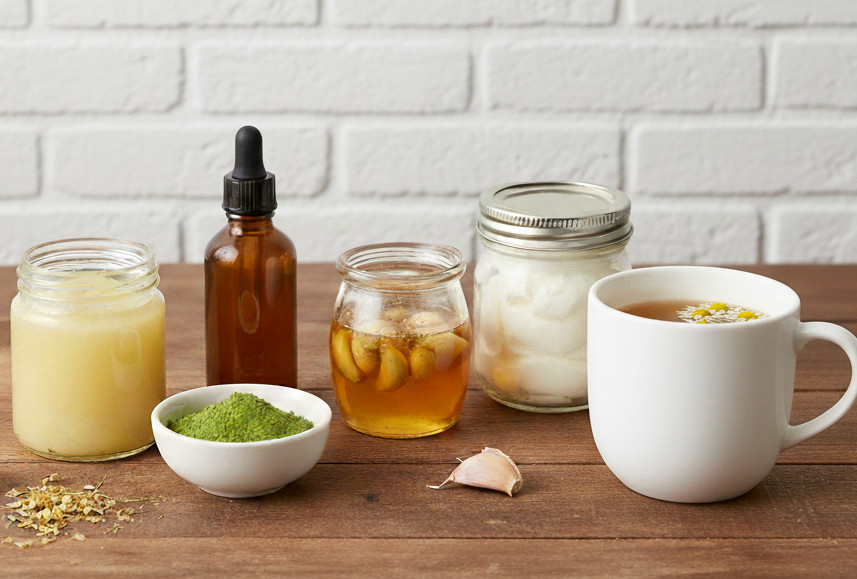
Tinctures & Oil Infusions
Tinctures: The Power of Alcohol, Glycerin or Vinegar
A tincture is arguably the most potent way to use an herb internally. It’s a highly concentrated liquid extract made by soaking an herb in a solvent. While high-proof alcohol (100 proof is preferable, 80 proof will work) is the traditional choice due to its excellent extraction and preservation abilities, you can also use vegetable glycerin or vinegar to create powerful, alcohol-free remedies.
For those who prefer to avoid alcohol, vegetable glycerin and vinegar are excellent alternatives. Glycerites, made with vegetable glycerin, are sweet and mild, making them perfect for children or for extracting the beneficial properties of sweet-tasting herbs. Vinegar-based tinctures are wonderful for pulling out minerals from nutrient-dense herbs. While these options are not as strong as alcohol tinctures and have a shorter shelf life, they are fantastic ways to make effective, non-alcoholic herbal remedies.
Alcohol Tinctures
Why Alcohol: Alcohol is an exceptional solvent for extracting a wide range of compounds, including resins, alkaloids, and volatile oils, which water often can’t pull out. It also acts as a powerful preservative, giving tinctures a very long shelf life. Because alcohol is cut with water (it is not pure alcohol), a tincture using alcohol can also extract the water soluble properties of herbs at the same time. This leaves you with a well balanced, long lasting, potent medicine ready to use whenever you need it.
Gylcerin Tinctures
Why Glycerin: A glycerite is a tincture made with vegetable glycerin, which is a sweet, syrupy liquid derived from vegetable oils. Glycerin is a weaker solvent than alcohol, so it’s less effective at extracting certain compounds. This is a great option for herbs with a naturally sweet taste or for children and people who would prefer to avoid alcohol. Glycerites typically last 1-2 years before they must be discarded and made again.
Vinegar Tinctures
Why Vinegar: Typically apple cider vinegar is the vinegar of choice when making a tincture, but white vinegar or other vinegars can be used as well. Vinegar is good for extracting minerals and is a popular choice for herbs like nettle and red clover. Like glycerin, it’s not as strong a solvent as alcohol and it does not have as long of a shelf life. Vinegar tinctures also last about 1-2 years before they start losing potency and should be remade.
Fresh Vs. Dry Plant Material
There’s often a debate on whether you should use dry or fresh plant material to make a tincture. This comes down to your own preference. I prefer to use fresh plant material because the plant still contains all of it’s alcohol and water soluble properties. When a plant is dried, it loses a lot of the water soluble properties. By using fresh plants, I feel tinctures are more balanced. But some people swear by dry plant material over fresh. Chose whichever works for you, the resulting tincture will still end up providing valuable medicine.
Research your Herbs
Many herbs are not safe for women who are pregnant or nursing, and/or infants and small children. Research your choice of herbs before using, or consult a healthcare professional to determine if they are safe for you and your family.
How to Make a Tincture
- Fill a clean jar or other container with a lid full of fresh plant material. Use a jar/container that is just big enough to hold the amount of plant material you have. I like to use mason jars. I do not use an exact ratio of plant material to solvent.
- Pour your chosen solvent (alcohol, glycerin, or vinegar) over the plant material until you reach the very top of the jar. You may have to wait a minute for the liquid to get into all the nooks and crannies. Add more if needed until it reaches the brim of the jar/container.
- Cover the jar/container with a lid and place in a cool, dark place.
- Let steep 6-8 weeks.
- Strain out the plant material so you are left with only the liquid. I like to use nut milk bags to strain mine, but coffee filters, cheesecloth, or other fine straining material will work.
- The tincture is now ready for use!
Dosages
The typical dose for an alcohol tincture is about 1/2 tsp for a 150 lb human 3 times a day. This can be adjusted up or down depending on the weight of the human, but this is a general rule. This dosage also works for pets and livestock as well. If you are currently sick and taking an herb to help you fight a cold, flu, or some other bug, taking a dose every 3 hours or so will help give you a bit more of a boost.
Because vinegar and glycerin tinctures are less potent, you may need to increase the dosage before you see any benefits from them. Start at the alcohol dosage, and increase by about 1/8 of a tsp at a time until you feel you get the benefits and feel you’ve reached the right dosage for you with each herb.
Making Tinctures taste good
Tinctures, especially alcohol and vinegar ones, do not generally taste very good. Even herbs that typically taste really good do not taste very good in tincture form. It is much easier to take them if you place the the dose in a small amount of water or juice and drink it. You might be in for an unpleasant surprise if you just drop it straight into your mouth!

Oil Infusions: The Gentle Soak
Oil infusions are the foundation for many topical herbal preparations. This process involves gently infusing a carrier oil with an herb’s fat-soluble properties. The resulting oil is rich in medicinal compounds. You can create an oil infusion using either a patient cold-soak method or by gently warming the herbs and oil together for a few hours. The final infused oil is then used as-is, or as the base for creating your own homemade salves, balms, and creams. It can also be used to cook with.
I prefer the long, cold-soak method to avoid any potential loss of a plant’s medicinal compounds.
What Oils are best
The oil you use is entirely up to you. Olive oil is the most widely used oil for medicinal infusions, but make sure it is pure olive oil. Many olive oils are cut with vegetable oils as a cost saving measure for companies. I prefer avocado oil because it easily soaks into the skin. Coconut oil may also be used, but could be a little harder to use since it is solid at room temperature.
Do not use any type of vegetable or seed oil. These oils are very inflammatory and will cause health problems instead of help to heal them.
Making an herbal oil infusion using a cold infusion method
- Fill a clean jar or container with the dried medicinal plant material. Use a jar/container that is just big enough to hold the amount of plant material you have. I like to use mason jars. I do not use an exact ratio of plant material to oil.
- Pour the oil over the plant material until the jar/container is completely full.
- Sit the jar in a warm, dry place for 6-8 weeks.
- Strain out the plant material from the oil. I like to use these nut milk bags, but cheesecloth or another fine weaved cloth would work as well.
- The oil is now ready to use!
Making an herbal oil infusion using a low heat method
- Place dried plant material and oil into a double boiler or slow cooker. Use just enough oil to fully cover the herbs.
- Using very low heat, heat the oil in herbs for several hours. At least 3-4 hours is ideal. Low heat is essential because you do not want to cook the herbs.
- Strain the plant material from the oil using the same method as the cold infusion.
- The oil is now ready to use!
how to use an herbal infused oil
Once you’ve made your herbal oil infusion, it’s ready to be used. You can simply apply the oil directly to the skin to massage sore muscles, moisturize dry patches, or soothe irritation. For example, a calendula-infused oil is excellent for calming irritated skin or putting on a wound, while an arnica oil is a go-to remedy for easing bruises and muscle aches.
Herbal oils also serve as the perfect base for making other products. With just a few simple ingredients, you can turn your infused oil into a healing salve or balm by melting it with beeswax, or blend it with other ingredients to create your own lotions and creams.

Honey Infusions: Sweet Medicine
Infusing honey with herbs is a wonderful way to create a sweet, soothing, and flavorful medicine. Raw honey itself has natural antimicrobial and anti-inflammatory properties, making it an excellent medium for extracting and preserving an herb’s beneficial compounds. Honey infusions are particularly effective for soothing sore throats, calming coughs, and boosting the immune system. Honey infusions can also be used over wounds or as a moisturizing face mask in the shower.
How to Choose Your Honey and Herbs
choosing your Honey
Use raw, local honey whenever possible. Raw honey is unprocessed just as nature intended. It retains more natural enzymes and pollen than processed honey, which add to the therapeutic value.
choosing your herbs
You can use dried or fresh herbs for a honey infusion, however the water content of fresh herbs can cause the infusion to ferment. The best choice in herbs are ones that complement the sweetness of the honey, such as ginger, cinnamon, clove, mint, or lavender. Garlic is also a popular option.
How to Make a Honey Infusion
- Place your herbs into a clean glass jar. You can fill the jar from a quarter to halfway with the herbs.
- Slowly pour the raw honey over the herbs, stirring to remove any air pockets. Make sure the herbs are completely submerged in the honey.
- Seal the jar tightly and place it in a cool, dark place.
- Let the mixture infuse for at least 1-2 weeks, up to a month. Shake or stir the jar every few days to redistribute the herbs and ensure an even infusion.
- After the infusion period, you can strain the herbs out using a fine-mesh strainer or cheesecloth, or you can leave them in.
How to Use Your Honey Infusion
- Directly: take a spoonful of honey to soothe a sore throat or cough.
- In Beverages: Stir it into hot water or a cup of herbal tea for a delicious and medicinal drink. You can also use it in lemonade or any sweetened drink.
- Culinary Uses: Drizzle it over yogurt, oatmeal, or toast or add it to salad dressings.
Oxymels: The Tangy Fusion of Honey, Vinegar & Herbs
An oxymel is an ancient herbal preparation with a name that literally means ‘acid and honey.’ This classic remedy uses the powerful properties of both vinegar and honey to create a unique tonic that is both sweet and tangy. The vinegar helps to extract minerals and other compounds from tough plant material, while the honey adds its own healing properties and masks the strong flavor of the vinegar.
How to Choose Your Ingredients
Vinegar
A high-quality, raw apple cider vinegar (ACV) with the “mother” is the most ideal choice for vinegar. The “mother” contains beneficial bacteria and enzymes that enhance the health benefits of the oxymel. You can use other vinegars as well, but you will lose the health benefits the “mother” of ACV will give you.
honey
Raw, local honey is the ideal choice for this herbal remedy. Raw honey is unprocessed so it retains more natural enzymes and pollen than processed honey. I would not recommend making the oxymel with processed honey, but if that’s all you have you could do it. The processed honey will remove some of the health benefits of the oxymel.
Herbs
Herbs that are good for respiratory or immune health and stand up well to the vinegar, such as thyme, elderberries, garlic, ginger, rosemary, or sage are ideal. I have an oxymel made with oregano that works beautifully.
How to Make an Oxymel
- Fill a clean glass jar about half full with your chosen dried herbs.
- Pour equal amounts of ACV (or another vinegar) over the herbs. If you’re not exact, that’s okay. Just do your best to use equal amounts of each.
- Shake the jar vigorously to mix the vinegar and honey together and distribute the herbs evenly.
- Seal the jar tightly and store it in a cool, dark place for 2-4 weeks. Shake or turn the jar every few days to mix the ingredients and make sure the honey does not settle to the bottom.
- Strain the herbs out using a fine-mesh strainer or cheesecloth. Pour the finished oxymel into a clean bottle.
- Your oxymel is now ready to use!
Using Your Oxymel
- As a Tonic: Take a spoonful directly, especially during cold and flu season. Take it every few hours if sick, or a spoonful daily for prevention.
- In a Warm Drink: Add a tablespoon to a cup of warm water for a soothing and immune-boosting drink.
- In the Kitchen: Use it in salad dressings, marinades, or as a glaze for roasted vegetables. This is a great way to add both flavor and a healthy boost to your meals.
- As a Syrup: Use as a delicious alternative to cough syrup.
How to Use Medicinal Herbs as Powders and Capsules
For those who need a precise and convenient way to take their herbs, capsules and powders are an ideal option. This method bypasses the need for brewing teas or mixing concoctions, offering a simple way to incorporate medicinal herbs into your daily routine. They are perfect for herbs with an unpleasant taste or for when you’re looking for a consistent dosage.
What are Herbal Powders?
Herbal powders are simply the entire dried herb ground into a fine consistency. How to use medicinal herbs in this form is easy: just blend a spoonful of a powder like maca or ashwagandha into your morning smoothie, or stir it into a bowl of yogurt. This is a great way to ensure you’re getting all the nutritional fiber and compounds from the plant.
Herbal Capsules
Herbal capsules are simply dried herbal powders that have been sealed inside a capsule. Capsules are tasteless and odorless, making them perfect for herbs that are bitter or pungent. They also allow for a very precise and consistent dose. Pre-made capsules are widely available, or you can also buy a simple capsule-making machine for a DIY approach.
Important Considerations
- Quality: It’s extremely important to source high-quality, organic herbs. Lab tested for quality and purity is even better for pre-made capsules.
- Usage: Capsules are good for ailments that are in or below the digestive tract, or are for general health. If you have a cough, respiratory illness, sore throat, or other similar ailment a more direct remedy applied to, or can be absorbed by, the impacted area will be more effective.
- Dosage: Research the correct dosage for each herb. It’s best to consult with an herbalist or healthcare professional before deciding how much to take and how often.
- Preparation: The powders must be completely dry to prevent mold from growing inside the capsule.
Poultices and Compresses
When an herbal remedy needs to be applied directly to a specific area of the body, poultices and compresses are generally the go-to methods. While often used interchangeably, these preparations have a distinct difference in their form. Both are powerful ways to deliver concentrated herbal relief to bruises, sprains, rashes, bug bites, wounds and skin irritations.
Poultices: The Direct Application
A poultice is a direct application of fresh or dried herbs to a targeted area. The herb itself is the remedy—for example, crushed fresh plantain leaves can be used to draw out the venom from a bee sting. The moisture and direct contact allow the plant’s medicinal compounds to be absorbed right where they are needed. It’s a classic, simple, and powerful method for on-the-spot relief.
Poultices are great for drawing out splinters, soothing insect bites, reducing swelling, or delivering a high concentration of healing compounds to a specific area.
How to Use a Poultice
- Fresh Herbs: Fresh herbs are often crushed or chewed to release their juices before being applied. A classic example is a plantain poultice for a bee sting.
- Dried Herbs: Dried herbs are usually mixed with a little hot water to form a thick paste.
- How to Apply: Place the poultice directly on the affected area and cover it with a bandage or cloth to keep it in place and prevent it from drying out.
- Leave the Poultice in Place: Take the poultice off after 10-20 minutes.
Compresses: The Herbal-Infused Cloth
A compress, by contrast, uses a cloth soaked in a strong herbal infusion or decoction. This method is less messy and is ideal for covering larger areas or for using the therapeutic benefits of temperature. For a sore muscle, a hot compress soaked in a ginger decoction can increase blood flow and relieve pain. For a bruise or sprain, a cold compress made with arnica infusion can help reduce swelling and inflammation.
Compresses are excellent for covering a larger area and for providing a soothing or anti-inflammatory effect without the mess of a poultice. The temperature of the compress adds another layer of benefit.
How to Use a Compress
- Hot Compress: This is often used for sore muscles, aches, or to draw out infections. The cloth is soaked in a hot herbal liquid, wrung out, and applied directly to the affected area.
- Cold Compress: A cold compress is ideal for inflammation, swelling, bruises, or sprains. The cloth is soaked in a cold herbal liquid and applied directly to the area.
Soothing Salves & Creams: Topical Herbal Remedies
When you need to soothe a rash, moisturize dry skin, or heal a cut, herbal salves, balms, creams, and lotions are the perfect solution. These preparations are designed to deliver an herb’s healing properties directly to the skin, offering targeted relief. While they all serve a similar purpose, their consistency and ingredients can vary.

Salves and Balms
Salves and balms are a solid or semi-solid blend of an herbal-infused oil and beeswax. Balms typically contain more wax and are firmer.
Benefits and common uses
- Benefits: Because they are water-free, salves and balms are incredibly stable and have a very long shelf life. They also create a protective barrier on the skin, which helps to lock in moisture and protect against environmental irritants.
- Common Uses: They are often use for minor cuts, scrapes, rashes, chapped lips, and dry skin. Calendula (for inflammation), comfrey (for healing), plantain (for drawing out insect venom), and yarrow (stop minor bleeding) are some of my favorite herbs to use.
How to make a Salve or balm
- Using a double boiler, gently heat beeswax and your choice of infused oil(s) until the beeswax is melted. Use 1 part wax to 2 parts herbal oil for a salve and 1 part wax to 1 1/4 part herbal oil for a balm.
- Pour mixture into a jar or contain and allow to cool
- Your salve or balm is now ready to use!

Creams and Lotions
Creams and lotions are emulsions—a mixture of both oil and water. Lotions have a higher water content and are thinner, while creams are thicker and richer.
Benefits and common uses
- Benefits: The presence of water makes creams and lotions lighter and easier to spread. They are also more moisturizing than salves because they can deliver both oil- and water-soluble compounds to the skin.
- Common Uses: They are often used for general moisturizing, treating larger areas of dry or irritated skin like rashes, and for delivering hydration along with herbal benefits.
How to make a cream or lotion
Creating a stable cream requires a bit more care than a salve. It involves an emulsifier to bind the oil and water together. If you want it to last longer, or be more shelf stable, you also need to include a preservative. Unlike for salves and balms, there are many different types recipes for making both creams and lotions. Textures can vary as well depending on if you decide to whip your cream into a airier texture or leave it a little thicker. I’ll link to a post on making these at a later date, when I am able to write one.
How to Use Topical Herbal Remedies
- For Hydration: Apply lotions and creams to damp skin after a shower to lock in moisture.
- For Targeted Relief: Apply a thick layer of a salve or balm to cuts, scrapes, or areas of irritation for a protective and healing effect.
- Consistency is Key: Consistent application is crucial for the best results, especially for chronic skin conditions like eczema or dermatitis. You can typically apply these remedies topically several times a day. However, research the herbs you choose to use first to determine their safety.

Syrups and Lozenges
When you have a sore throat or a persistent cough, a sweet and soothing herbal remedy can make all the difference. Herbal syrups and lozenges are two classic preparations that use a sweetener, most commonly honey or sugar, to both preserve the medicine and make it pleasant to take. They are particularly effective for coating and soothing the throat, making them an excellent choice for a wide range of respiratory ailments.
Herbal Syrups: The Liquid Gold
An herbal syrup is a thick liquid remedy that’s as delicious as it is effective. You can easily make one at home by brewing a very strong herbal tea, such as elderberry or ginger, and then combining it with honey or sugar. The syrup is not only a fantastic way to soothe an irritated throat and quiet a cough, but the high sugar content also acts as a natural preservative, giving it a long shelf life when stored in the refrigerator.
How to Make an herbal syrup
- Start with a Strong Tea: Make a strong decoction or tea of herbs. Good herbs for syrups include elderberry (for immune support), ginger (for soothing), or wild cherry bark (for coughs). You can use more than one herb in your syrup. Powders added to hot water also work well as a base.
- Add Sweetener: Combine the herbal liquid with a sweetener, such as honey or sugar. The ratio is usually one part herbal liquid to one or two parts sweetener. The high sugar content acts as a preservative.
- Simmer to Thicken: Gently heat the mixture to dissolve the sweetener and thicken it into a syrupy consistency.
How to Use and Herbal Syrup
Syrups are typically taken by the spoonful to soothe a sore throat or cough. They can also be added to hot water to make a comforting drink.
Herbal Lozenges: On-the-Go Relief
Lozenges are small, solid forms of herbal medicine that offer targeted relief. They are particularly useful because they dissolve slowly in the mouth, allowing the herbal compounds to directly coat and soothe an irritated throat. This sustained release makes them an excellent choice for fighting a cough or sore throat throughout the day, and their portability makes them easy to carry with you wherever you go.
How to make an herbal lozenge
- Start With A Powdered Herb: Choose a high quality, powdered herb to start with. Ginger, slippery elm and marshmallow root are all great choices for lozenges.
- Add Sweetener: Add either honey or maple syrup to the powder to get a thick paste. A thick, liquid sweetener is essential. It will get sticky!
- Form Lozenges: Make the mix into small balls and place on a parchment lined tray. Set aside until hardened.

Herbal Baths and Soaps
Herbal Baths: Therapeutic Soaks
An herbal bath is a wonderful way to unwind and let your body absorb the healing benefits of herbs. The warm water opens your pores, allowing you to take in the herbs’ beneficial compounds through your skin, while the steam carries the aromatic properties to your lungs and senses. This combination provides a therapeutic experience for both your body and mind.
How to Prepare a Herbal Bath
- Bath Tea Bags: This is the easiest and tidiest method. Making a large “tea bag” by filling a muslin or cheesecloth bag with dried herbs. Good herbs for a relaxing bath include lavender, chamomile, or rose petals.
- Loose Herbs: Add loose herbs directly to the bathwater. While this is beautiful and relaxing, it can be messy to clean up.
- Herbal Bath Bombs: Add to bath water and soak in the water for at least 20 minutes.
- Strong Infusion: Add the strained tea or decoction liquid directly to the bathwater. This is an excellent option for more potent herbs like ginger, which can be irritating in their raw form.
- How to Use: Sit in the herbal bath water for at least 20 minutes to get the full benefits.
Herbal Soaps: Cleansing and Healing
Herbal soaps are a step above commercial bars. By infusing herbs directly into the soap-making process, you can create a cleansing bar that also delivers therapeutic benefits with every use. Whether it’s to soothe irritated skin, moisturize, or provide a gentle exfoliation, herbal soaps are a perfect way to bring the healing power of plants into your daily routine. Just about any herb can be used to make an herbal soap. Below are some examples.
How Herbs are incorporated into soaps
- Infused Oils: Many herbal soaps are made by first creating an herbal oil infusion, which then becomes the base for the soap.
- Powdered Herbs: Finely ground herbs or clays are added to the soap batter to provide color, texture, and a gentle exfoliation. Good examples are calendula powder for its anti-inflammatory properties or oatmeal for soothing the skin.
- Essential Oils: Essential oils are often added at the end of the soap-making process for scent and therapeutic benefits. Essential oils are the volatile oils from plants and are very potent. Caution should be used and only use them sparingly, if at all. I do not use essential oils and do not recommend their use, but many people like to use them.
How to Use Herbal Soaps
- For Soothing: A calendula or chamomile soap is great for sensitive or irritated skin.
- For Exfoliation: A soap made with ground oatmeal, coffee grounds, or poppy seeds can provide a gentle scrub.
- For Refreshing: A peppermint or rosemary soap can provide an invigorating shower experience.
Other Posts to Check Out:
My page on medicinal plants is a great place to start learning about medicinal herbs.
Why Medicinal Plants Matter: The Benefits of Nature’s Remedies